
Want to get more out of your Revit walls?
In this BIMsmith Revit Tutorial, Pete Heibel shares some tricks to get the most out of Revit's built-in wall features. In this video, we'll take two similar Revit wall types, stack them together, modify their layer constraints, and then add various profiles to create one complex but useful wall type which will save you a lot of time while drafting and detailing various wall conditions.
How to Create Complex Wall Types in Revit
1. Begin with a wall assembly of your choice.
First, you'll want to get a wall assembly or two in a project for you to adjust and test out these features.
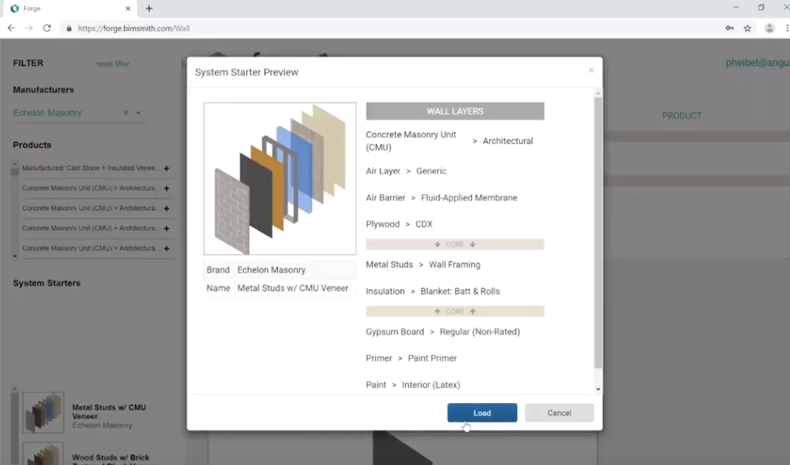
If you don't have one in front of you, head over to BIMsmith Forge to create and customize some Revit walls for free. In the video, we download two separate Revit walls from the system starter drawer that differ by just one layer.
2. Load the .RVT assembly into your project
There are a number of ways to do this. In the video, we show three methods:
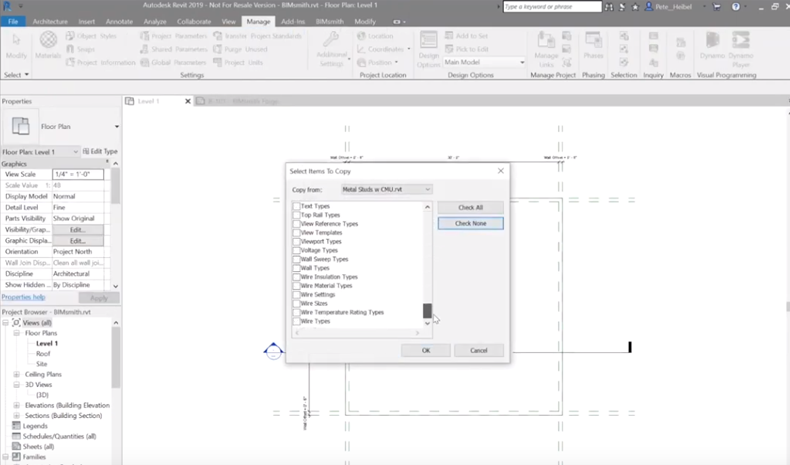
- 1. Open the .RVT file you downloaded, then double-click the wall type and copy and paste from one project to another
- 2. Use the "Transfer Project Standards" tool in Revit under the Manage tab in Revit
Both of the above methods accomplish the same goal. As a third alternative, you can expedite the entire import process with the BIMsmith Revit Plugin:
- 3. Download the free BIMsmith Revit Plugin, which brings the BIMsmith Forge app into Revit and allows you to build these wall system families without leaving Revit

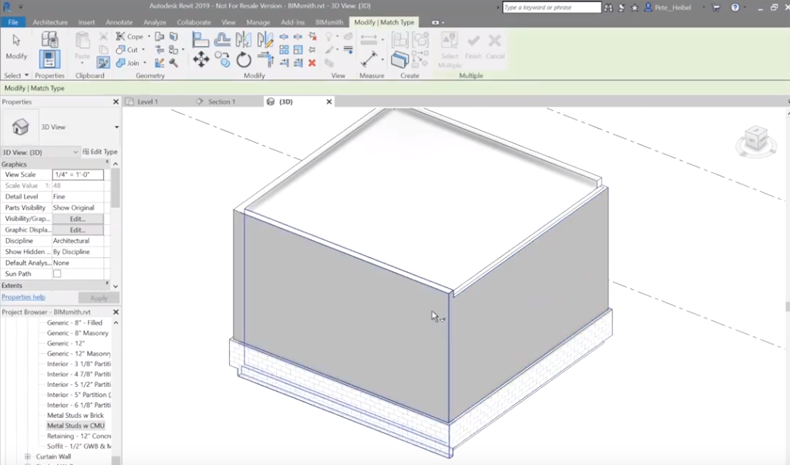
3. Stack the two wall types together
Open the Revit project browser to view the wall types you just created.
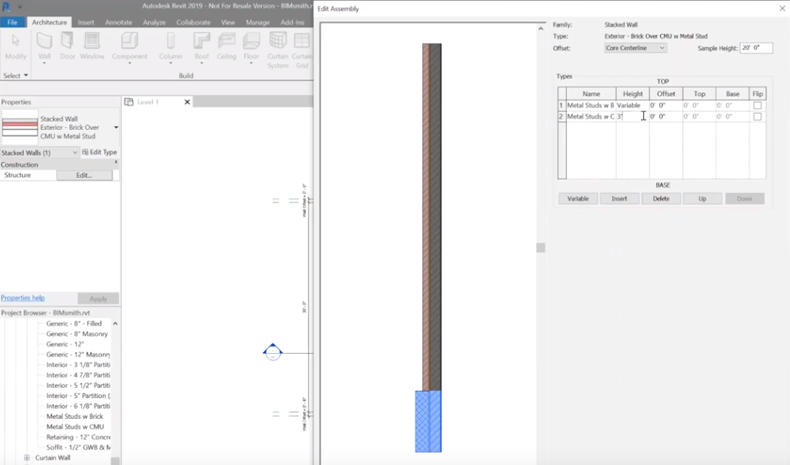
Navigate to the Stacked Wall Families section, then edit the family that already exists. Inserting a new layer allows you to stack one wall on top of the other. One wall will assume the variable height parameter, which reports the difference between the total wall height instance parameter and the height value of the remaining layer.
Create a new wall, then navigate down to the stacked wall category to place the wall in your project.
If you change the wall's Location Line parameter to "Core Face: Interior," it will allow you to draw the wall based on the location of the stud in the wall assembly.
4. Edit your wall's layer constraints
Editing some layer constraints allows you to have some flexibility in adjusting the extents of the layers.
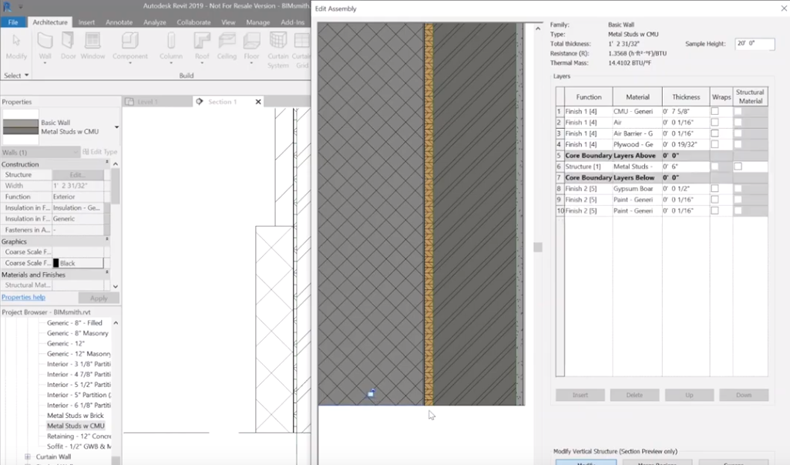
If you display the preview window in section view while editing the structure of the wall type, you can modify the walls' layers. By zooming in, you can select a lower boundary of any layer to unlock it, in this case allowing you to adjust the layers' extents independently of the wall type's built-in instance parameters.
5. Use the "Match Type Properties" command to apply the adjustments to the adjacent walls
Because this change is an instance parametric adjustment, rather than a type parametric adjustment, you can use the "Match Type Properties" command to apply the adjustment to the neighboring walls.
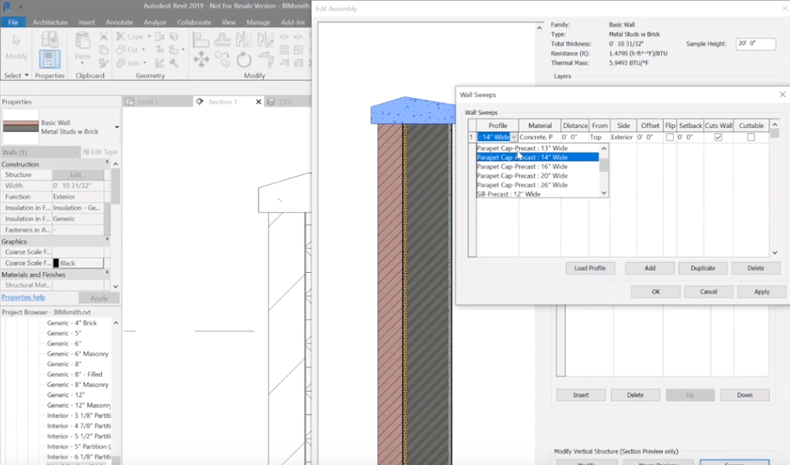
6. Make further edits to your wall type
You can continue to edit your wall type in any number of ways. In the video, we demonstrate how to add sweeps like sills and parapet caps.
When doing this, you can use any custom profile on your wall, as long as it's already loaded into your Revit project.
If you want to create a new type based on an existing profile, navigate to the profiles in the Project Browser, where you can duplicate an existing profile to edit.
(As you're working, remember to make sure the wall type preview is in section view in order to access the additional editing features.)
Play around with different combinations of sweeps to achieve your desired effect.
7. Keep exploring!
As with any new skill, it's best to keep playing around with different features to really get the functionality to stick in your mind. Go ahead - now's your chance to create some crazy wall types!
Thanks for checking out this Revit tutorial - if you have any questions or comments, please leave them below!
View More Videos By BIMsmith on YouTube
Subscribe for email updates about Revit, Architecture, and more.
--
![]() BIMsmith is a free cloud platform for architects, designers, and building professionals to research, select, and download building product data. Search, discover, compare, and download free Revit families on BIMsmith Market, or build complete, data-rich Revit wall, floor, ceiling, and roof systems faster with BIMsmith Forge.
BIMsmith is a free cloud platform for architects, designers, and building professionals to research, select, and download building product data. Search, discover, compare, and download free Revit families on BIMsmith Market, or build complete, data-rich Revit wall, floor, ceiling, and roof systems faster with BIMsmith Forge.


Comments