
When it comes to putting the final touches on a Revit project, lighting is one of the things you simply must get right.
Whether you're about to hit "Render" or step into a virtual reality environment to demo your design to a client, the way your lighting Revit families perform and behave can make or break the impression of the entire project - just like lighting in real life.
At BIMsmith, we've built thousands of lighting Revit families for the top lighting brands in the world. In collaboration with BIMsmith partner Focal Point, we decided to publish our top six tips for making your lighting families perform their best in Revit.
1. Use Type Catalogs When Available
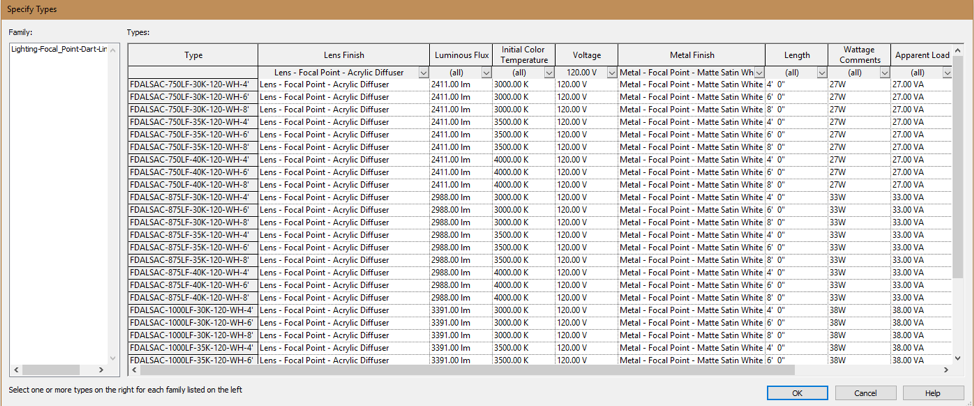
A type catalog lists all possible types in a family. They are practical when a light fixture has a large amount of options. They allow you to preview the data, filter through the essential features of the product and narrow down the selection to your needs.
How to Load a Family with a Type Catalog
To load a family with a type catalog, first you should have the type catalog placed in the same folder as the family you want to load. If the family is loaded without the external text file (.txt) the component will be incomplete.
Next, in your Revit project go to the Insert tab, click on the Load Family button under the Load from Family box. You may also use the keyboard shortcut “CM” and click Load Family to achieve the same result.
Then, navigate to the folder where the family is saved and click Open. The type catalog window will open. The structure is as follows:
a. Family: a list of family or families represented by their names
b. Types: the first column is the family type represented by their type names
c. Parameter columns: represent the different parameters and data that execute a full product
Next, narrow your selection by using the filter at the top of each parameter column.
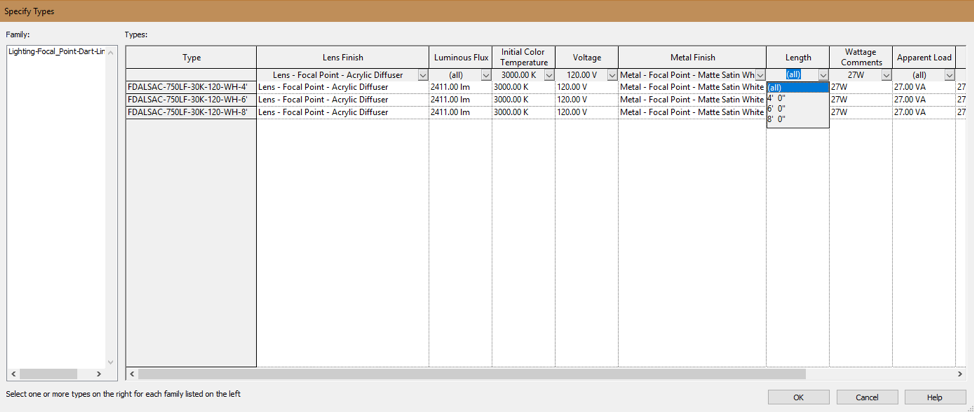
With one click in the little arrow looking down at the top of the column, all options within that parameter will show. Once a selection has been made, the type list will shorten with only those options that are linked to the selection.
In the Type Catalog window, you may now select a family type or multiple types by pressing Ctrl with each type you click.
Click OK and place the family.
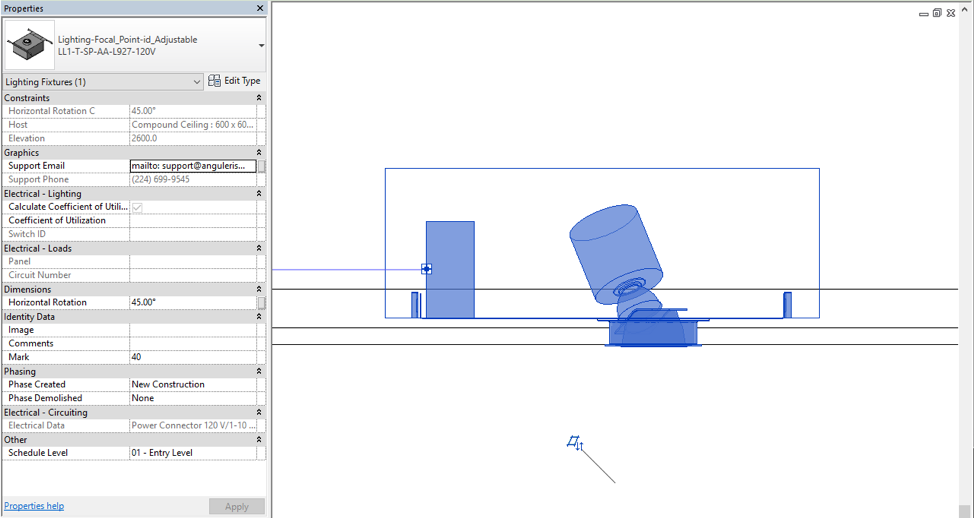
2. Use Dynamics to Your Advantage
Revit is a robust tool that allows you to manipulate objects dynamically and with intelligence. Most light fixtures, like the example above from Focal Point, have multiple length options, tilt angles, pendant cable length, etc., that will allow you to adjust those features in a project. This way, you may control the light fixture to meet your space requirements.
3. Pay Attention to Light Placement
Use the face-based template. This will allow you to place light fixture models in any face within the architecture software. You may even cut the surface with a void (recessed fixture, for example).
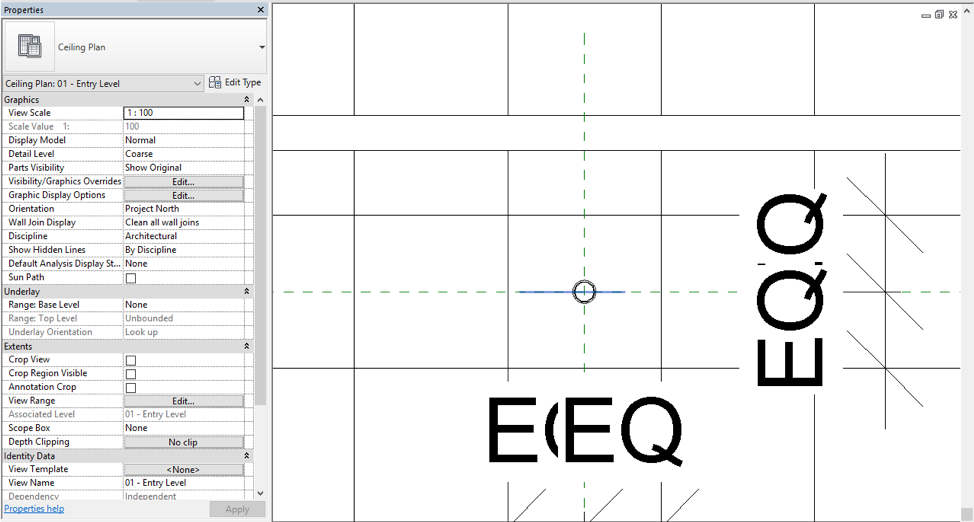
Also, keep in mind that a light fixture is best placed from the reflective ceiling plan. Once placed on the surface, it becomes easier to manipulate adjustable features from a 3D view.

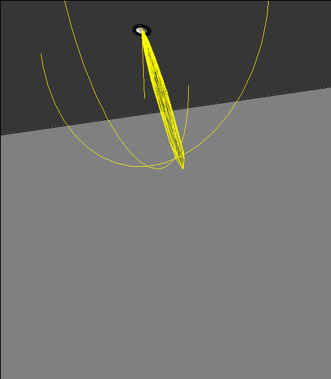
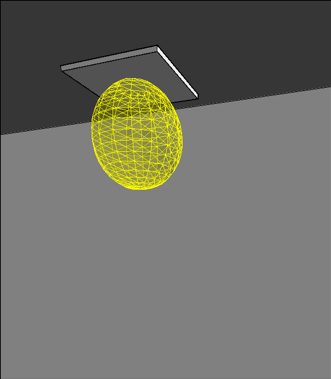
4. Take Advantage of Available Photometrics
In order to best represent the fixture's effect on the environment around it, it's always best to use IES files provided by the manufacturer. This will provide the most accurate representation of the real product. It will also result in a better rendering.
 |
 |
 |
 |
Use material self illuminance to create the effect of the light being turned on when rendered. Whenever you're designing with manufacturer BIM content, make sure to follow the manufacturer's information to determine your illuminance outcome.
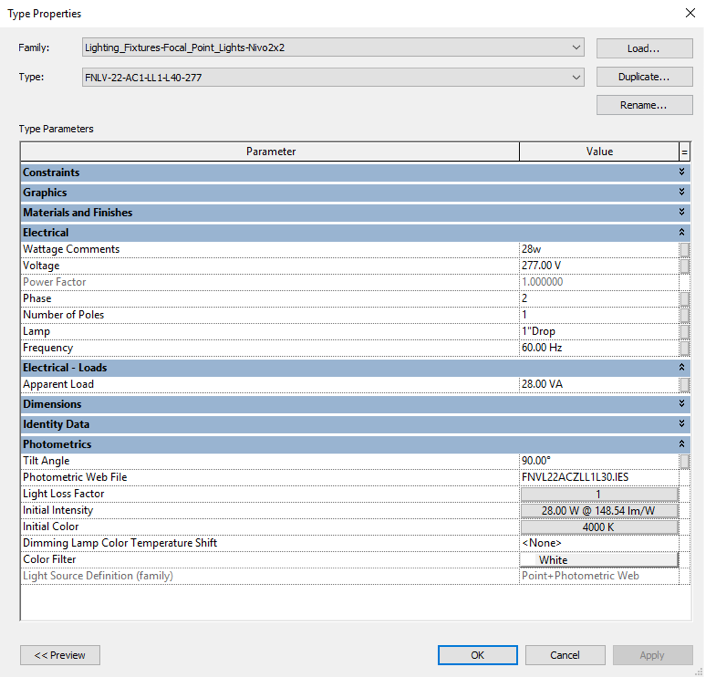
5. Explore the Identity Data Tab and Shared Parameters
This is a tab in the model’s Type Properties section. If you are looking for manufacturer-specific data, this is the best place to look for it. It may also include the model’s specifics that allow you to make decisions about which model to use before including it in your project.
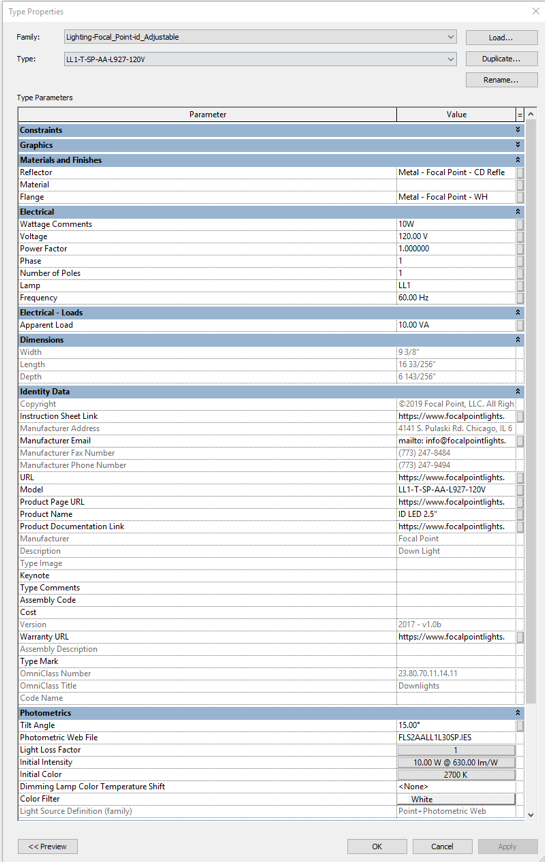
Shared parameters within the Type Properties section are schedulable. This means that you can specify manufacturer data (e.g., electrical, dimensions, material) in your drawings.
6. Use Manufacturer-Specified Electrical Information
Take advantage of the available model specs and don’t change the information. This will allow you to specify the manufacturer’s data for the product in your final documents.
Lighting models typically include a lighting connector that allows users to connect the fixture to circuits in the electrical plan.
Have Other Suggestions?
Do you have additional suggestions for using Revit lighting? Let us know in the comments below!
Want to learn more about using Revit lighting families? Check out this article on Choosing the Best Downlights for Your Revit Project, or visit BIMsmith Market to download architect-approved lighting BIM objects – including Revit pendant lighting, Revit suspended lighting, Revit downlighting, and more.
--
Eli Vazquez
Project Manager, BIMsmith
![]() BIMsmith is a free cloud platform for architects, designers, and building professionals to research, select, and download building product data. Search, discover, compare, and download free Revit families on BIMsmith Market, or build complete, data-rich Revit wall, floor, ceiling, and roof systems faster with BIMsmith Forge.
BIMsmith is a free cloud platform for architects, designers, and building professionals to research, select, and download building product data. Search, discover, compare, and download free Revit families on BIMsmith Market, or build complete, data-rich Revit wall, floor, ceiling, and roof systems faster with BIMsmith Forge.


Comments