

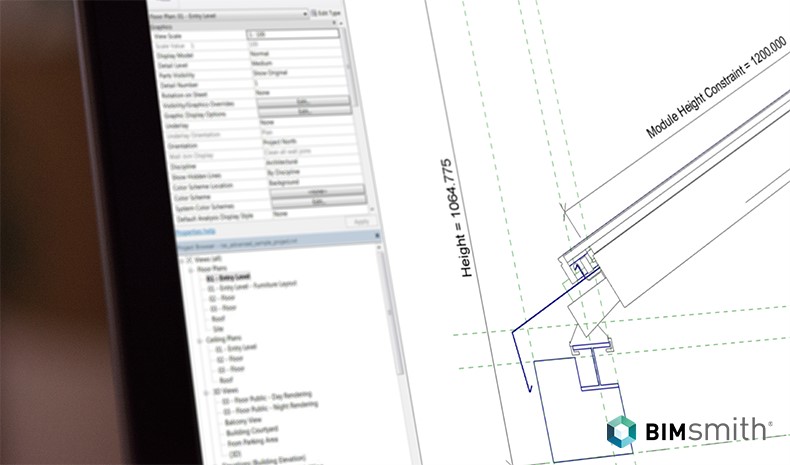
Revit is a powerful tool.
Even if you’re a Revit beginner, it doesn’t take much time to realize the breadth and complexity of data that Revit can manage and manipulate for you.
But in order to take advantage of the power behind Revit, you have to know how to “speak the language.”
I find this to be true every day that I use Revit, and want to share one of the most frequent instances in which proper syntax is essential: defining parameters.
(Caution: we’re about to enter Revit geek mode. Buckle up.)
Defining “Parametric” Building Product Data
For any who are unfamiliar, the term parametric (in terms of building product data) simply implies models created with specific parameters, or characteristics, which inform and guide the user how an object should be used.
This data often includes information such as:
- -dimensions
- -available colors
- -standard configurations
- -other product options
For example, a parametric model might specify that a certain object must possess a height value of either 12”, 24”, or 36”, and return a warning for any value entered outside of those parameters.
Leveraging parametric functions in Revit allows you to create intelligent content that responds to both arithmetic and user input.
This kind of data intelligence is the basic foundation of BIM (Building Information Modeling). It can guide users through a recommended process, or can “dummy-proof” a model to prevent a user from manipulating it in an improper way.
Revit consists of three types of parameters: Instance, Type (Family or Shared), and Global. When creating or editing these parameters, the user is given the option to assign each a formula, enabling constraints or allowing various parameters to respond to each other.
So let’s get down to the details. Here are 5 formulas and their required syntax that I believe every Revit user must know when creating parametric BIM content in Revit.
1. Constraining Min/Max Values
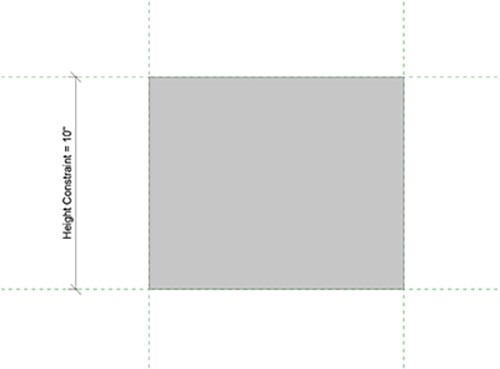
Utilizing “if” statements (or conditional statements) in a Revit formula for any Length parameter is something I leverage daily. The concept is simple and something you may have previously encountered in spreadsheet software such as Microsoft Excel:
if ( <condition> , <result-if-true> , <result-if-false> )
I often use this syntax for constraining Length values so that a user cannot enter a value that would break the model. For example, if you were to constrain the minimum height of a table, you might create the following parameters:
Parameter: Height
Value: [User Input]
Parameter: Height Constraint
Value: [Length]
Formula: = if (Height < 10”, 10”, Height)
The constraint parameter with the formula talks to the parameter that accepts user input. The Height Constraint parameter is the label that is applied to reference lines within the project, and the Height parameter does not need to exist anywhere outside of the parameter list.
If you were to constrain the maximum height of the table as well, the formula could contain the following nested conditional statement:
= if (Height < 10”, 10”, if (Height > 40”, 40”, Height))
Conditional statements can be nested indefinitely, allowing you to constrain parameters however you desire.
Next, we’ll take a look at how this syntax could be used for text, or strings.

2. String Formatting Using If Statements
I use the following syntax to automate strings in text parameters such as the built-in Model parameter found in any Family template:

Parameter: Model
Value: [Text]
Formula:
= if (Width = 24”, “Armchair”, if (Width = 48”, “Loveseat”, if (Width = 72”, “Sofa”,
“Width not available: Please select a width of either 24, 48, or 72 inches”)))
This is simply filling out the Model parameter for us as we adjust the Width parameter, clearly communicating to the user available sizes for that product. Using this technique allows the content provider to ensure that a user cannot represent a custom product that a particular manufacturer may not provide.
3. Operators in Nested Statements
In order to add to the functionality of the syntax we have covered so far, we can nest operators such as And, Or, or Not to create more complex logic. For example, we could use the And operator to allow a height to adjust based on a width range:

Formula:
= if (and( Width > 10”, Width <20”), Height = 30”, Height = 36”)
This can be described as follows: if the Width is both greater than 10” while being less than 20” (so between 10” and 20”), then the Height will be set to 30”. If the Width parameter falls outside of that range, the Height will resort to 36”.
Now to put operators and strings together, we could use the Or operator in the following way:
Formula:
= if (or( Width > 100”, Height > 48”), “Custom Size: Please Contact
Manufacturer”, “Standard Size”)
In this formula, if either the Width or the Height parameters exceed a maximum value, the user will be notified that what they desire to specify in the model would be a custom size.
Here’s a trick: I like to use the operator Not as a work around since the syntax for Revit does not include ≤ less than or equal to, or ≥ greater than or equal to. It looks like this:
Formula:
= not(Height > 100”)
This essentially constrains the parameter to be less than or equal to 100”. Again, this can be nested into other formulas as desired.
4. Escaping Quotation Marks in Text Parameters
This one is satisfyingly simple, and for some strange reason, one of my favorites! In the past I would have a situation where I would need to lock a text parameter so that the user could not easily change its value. Sometimes, the text itself would need to contain quotation marks. Being as quotation marks are used to enclose strings (or text), I would often get an error.
Parameter: Range
Value: [Error]
Formula: =(“36” - 48””)
One obvious work around is replacing the inch quotation marks with two apostrophes. But Revit allows you to use the \ escape character to bypass the error. Therefore, the above formula could be rewritten as:

Parameter: Range
Value: 36” - 48”
Formula: =(“36\” - 48\””)
5. Trigonometric Formulas
Finally, I will cover some trigonometric syntax I have only recently learned how to put to use in creating parametric Revit content. Perhaps you have a situation where the hypotenuse (or angled portion) of a piece of geometry needs to remain fixed but it has a parametric height. This would require the base of the triangle to shrink as the height increases. But at what rate? Thankfully, trigonometry helps us solve this issue perfectly:

Hypotenuse: 36” [fixed]
Base: sqrt((Hypotenuse ^ 2) - (Height ^ 2))
Height: [user input]
As the user inputs a desired Height, the Base will adjust according to the Pythagorean Theorem. One particular use for trigonometry that I encounter often is when I need to constrain skylights. Perhaps the user wants to specify the Height of a skylight and they also want to specify the angle at which it is sloped. The Height of the skylight becomes my hypotenuse in the following set up:
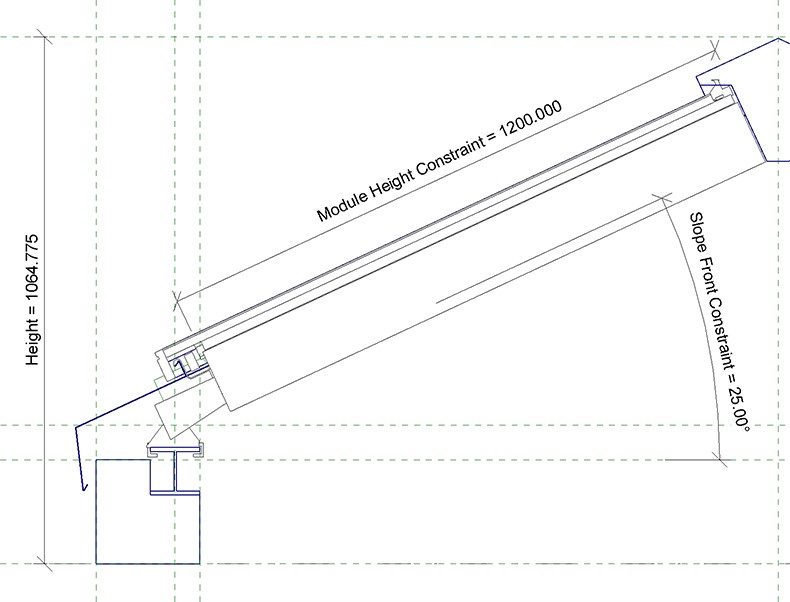
The height of the triangle in this drawing would automatically adjust as the user inputs the desired height of the skylight and the desired slope. This can get much more complex as you can imagine, but I will keep it simple for this introduction.

Intelligent Models That Enhance Your Revit Workflow
These five tricks I have covered can be incorporated into your workflow to create more intelligent parametric content that can report data automatically or simply restrict the parametric capacity of a model to remain within realistic dimensions. I hope you can make use of at least one of these to enhance your Revit workflow. Let me know in the comments if you have thoughts or suggestions!
You can find more information on Revit syntax on the Autodesk website.
--
Peter Heibel
![]() BIMsmith is a free cloud platform for architects, designers, and building professionals to research, select, and download building product data. Search, discover, compare, and download free Revit families on BIMsmith Market, or build complete, data-rich Revit wall, floor, ceiling, and roof systems faster with BIMsmith Forge.
BIMsmith is a free cloud platform for architects, designers, and building professionals to research, select, and download building product data. Search, discover, compare, and download free Revit families on BIMsmith Market, or build complete, data-rich Revit wall, floor, ceiling, and roof systems faster with BIMsmith Forge.


Guest, 3/29/2020 11:03:00 PM
Hi I have used this formula but Revit Says "inconsistent units" would you kindly advise on what the error was ? Thank you so much! if(OPENING<0.1, 0.1, if(OPENING>0.9, 0.9, OPENING))
Guest, 3/30/2020 8:42:30 AM
Hi, thanks for your comment. Can you make sure that OPENING and the parameter this formula goes in are using both using Length parameters? It could be that one of them is a number parameter. Or, if you really want to use a number parameter and a length parameter together, you can multiply (or divide) by a single project unit (1" or 1' or 1mm). Let us know if that helps.
Guest, 5/24/2020 5:15:44 AM
Thanks a lot for sharing your knowledge with the beginners♥️