


Building multi-layer assemblies in Revit can be a time-consuming process.
Whether they're exterior walls or roofs, or interior floors and ceilings, incorporating all of the physical layers that go into a system takes time – and lots of it.
Sure, you can get by with just throwing together a generic layer or two for a rendering, but in order to leverage the full value of BIM workflows in Revit, you need to include the real data. And if you intend to specify a manufacturer product in your project, the process is more intensive as you factor in finding, downloading, and placing manufacturer BIM content into your systems.
In many cases, it's just not worthwhile.
But BIMsmith Forge® changes things. BIMsmith Forge is a free cloud tool that makes the creation and placement of multi-layer Revit assemblies easy.
Forge uses a massive database of over 500,000+ Revit materials to enable you to select various building products to place in a wall, roof, ceiling, or floor system. Once you tell Forge the combination you would like to build, Forge uses patented technology to actually build a BIM-ready system behind the scenes.
Click Start Designing to try it for yourself, or see step-by-step how to use Forge's 500,000 Revit materials in your project.

How to Build With 500,000 Revit Materials in BIMsmith Forge
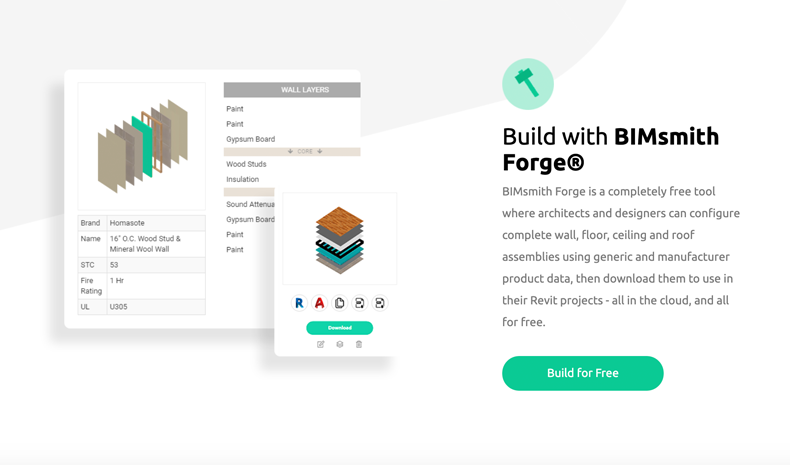
1. Visit BIMsmith.com and click “Build for Free”
The BIMsmith platform has two main applications: BIMsmith Forge (Revit configurator) and BIMsmith Market (Revit families and research platform). While you can download individual Revit materials on BIMsmith Market, using Forge enables you to combine Revit materials from many manufacturers at once.
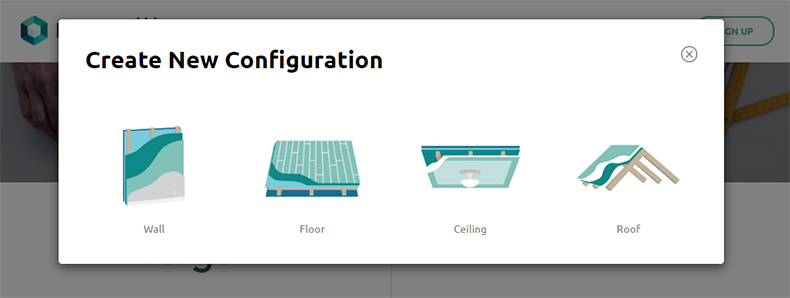
2. Select the type of Revit system you would like to build.
BIMsmith Forge configures four main types of systems: Walls, Floors, Ceilings, and Roofs. Each section of the Forge configurator is tailored with specific products for the type of system you are building.
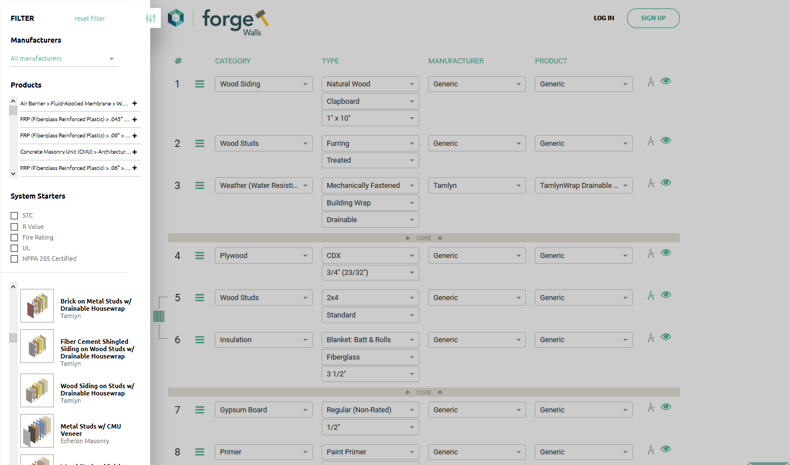
3. Use the drawer on the left-hand side of the screen to choose from pre-built systems, manufacturers, or products.
This toolbar is your best friend when designing in BIMsmith Forge. You can select a pre-built system starter, so all you need to do is make small tweaks and changes. You can also browse products and system starters by manufacturer, or even by technical criteria like UL Rating, Fire Rating, STC Rating, and more.
4. Select a Category, Type, Manufacturer, and Product for each layer of your system
A few years ago, BIMsmith underwent the large undertaking that we called the Building Genome Project in attempt to designate into categories the broad spectrum of building products that might be used in a multi-layer wall, roof, ceiling, or floor system.
BIMsmith Forge uses these categories to classify every product that you might want to place in your system.

For each category, there are typically multiple variations that help narrow down the selection for your specific application.
Once you’ve selected the Type, you can either select a Manufacturer or Generic equivalent from the dropdown. (Obviously, there’s more BIM-related value from selecting manufacturer products, but we get that sometimes your project or firm requires you to select a generic placeholder.)
Finally, select the product that best matches your intentions.
5. Use the material browser to make color and texture selections.
Often overlooked is the compass icon to the right of each layer, which opens up the Forge Material Browser for you to select any additional finishes that you would like in your system.
From selecting paint colors from Sherwin-Williams to paver patterns from Belgard Commercial to shingles from GAF and fasteners from Grabber, the material browser allows you to get as granular as you want with your system before digging into Revit.
Each material is carefully crafted to precisely represent its real-world equivalent with colors, textures, and seamless images. BIMsmith Forge Materials also include all the applicable hatch patterns and identity data you need to streamline your workflow in plans, elevations, and sections.
6. Use the BIMsmith Forge visualizer to view your system as it takes shape.
Click the “+” button to add additional layers. You can also duplicate, delete one, or delete all as you go. As you design, your system is displayed in the visualizer underneath, which you can explode and manipulate to assist you as you design.
Pro Tip: Don’t forget to name your system. The assembly will be visible to you and your firm in your MyBIMsmith Account using the name and visualizer preview, so make it descriptive or in line with your firm’s naming conventions.

7. Click “Build” to complete your system and create a Revit file.
The secret sauce happens behind the scenes, and the next screen will allow you to download a .zip file with your Revit assembly ready to go.
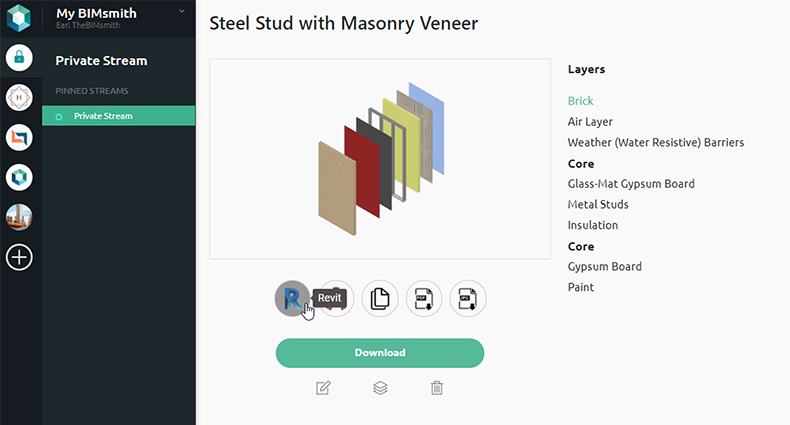
8. Download your new Revit system from MyBIMsmith.
Your new system opens up in a new window within MyBIMsmith, your free cloud storage account in which you can save every single one of your assemblies from BIMsmith Forge or Revit families from BIMsmith Market to store for later and share between your teams and projects.
On this screen, you can download the Revit project containing your new assembly, but you can also include it in AutoCAD format, as well as specifications, cut sheets, and images for every single layer in the system. It’s that easy.
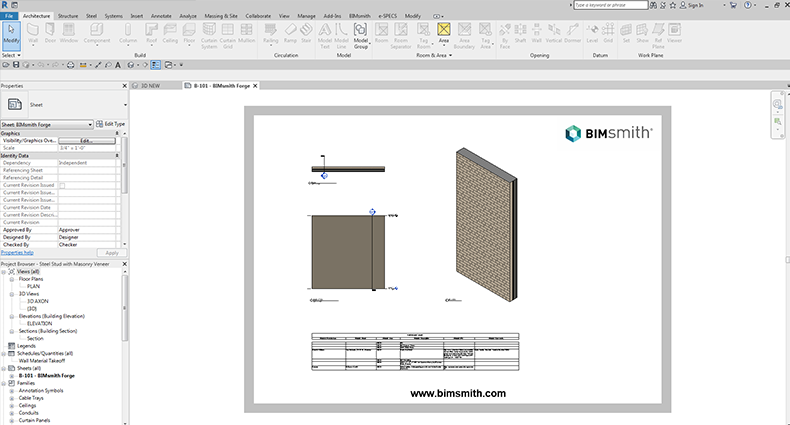
9. Open up the system and transfer to your project.
Your Revit assembly downloads as a .rvt Revit project, so all you’ll need to do is open it up, copy the system, and then paste into another project.

10. Download the BIMsmith Revit Plugin to take care of this entire process without ever leaving Revit.
Now that you’ve done it the normal way, you can also download the BIMsmith Revit Plugin to bring the full functionality of BIMsmith Forge into Revit so you don’t have to use your browser at all. Download the BIMsmith Revit Plugin here.
Always Free. Always Awesome.
And the best part of it all is that BIMsmith has always been and will always be 100% free. No exceptions.
Try out BIMsmith Forge here, or download the BIMsmith Revit Plugin to try it in your project.
--
Ethan Adams
![]() BIMsmith is a free cloud platform for architects, designers, and building professionals to research, select, and download building product data. Search, discover, compare, and download free Revit families on BIMsmith Market, or build complete, data-rich Revit wall, floor, ceiling, and roof systems faster with BIMsmith Forge.
BIMsmith is a free cloud platform for architects, designers, and building professionals to research, select, and download building product data. Search, discover, compare, and download free Revit families on BIMsmith Market, or build complete, data-rich Revit wall, floor, ceiling, and roof systems faster with BIMsmith Forge.