The project browser is the ‘control panel’ for your Revit project. You use it to navigate through all your views, schedules, sheets, groups, and families present in your current project. Needless to say, it’s pretty darn important!
The out-the-box project browser hierarchy is pretty sensible and can work well on small projects. But when our projects start getting larger, with perhaps hundreds of sheets and potentially thousands of views, It’s nice to be able to control and organize the Project Browser for more efficient use. We don’t want to have to waste our time scrolling and searching through the Project Browser to find the correct view!
In this blog post, I’ll share some common sense ways to organize your own project browsers.
Organizing the Project Browser
First, let's look at how we can find the project browser organisation settings. If we go to the Project Browser and right click on either Views or Sheets, we can see the Browser Organization… button.

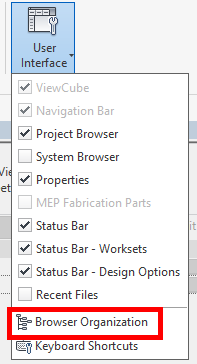
Alternatively, if we go to the View tab and click on the User Interface dropdown, we can find the Browser Organization button near the bottom.
Organizing Sheets
Your drawing sheets should follow a numbering system, typically starting with a letter (A for architectural, S for structural etc.) followed by a series of numbers. Generally, these get grouped together. So for example the:
- • 0-Series may contain cover sheets, general notes etc.
- • 1-series may contain the plans,
- • 2-Series may contain Elevations,
- • 3-Series may contain Sections etc….
There is no right or wrong way and each company will have their own structure. If we don't organize our sheets in the project browser, we can get a situation like the following:
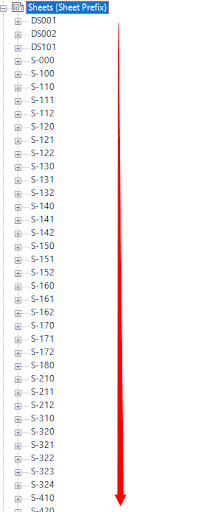
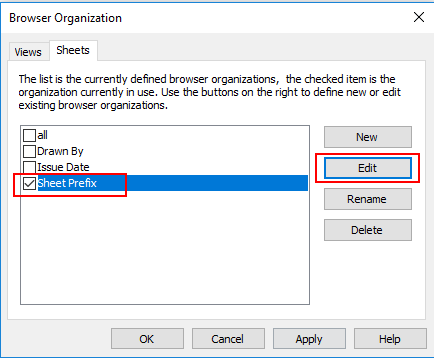
As you can see there are a lot of sheets, and we would need to scroll down and try and find the one we want to view. An easy way to organise this a bit better is to group the Sheets by their Prefix/Sheet series number. If we open our Browser Organization dialog box, on the sheets tab find Sheet Prefix and select Edit.
Under the Grouping and Sorting Tab, bump up the Leading characters number up to 3. This sorts our sheets into manageable groups for easier navigation:
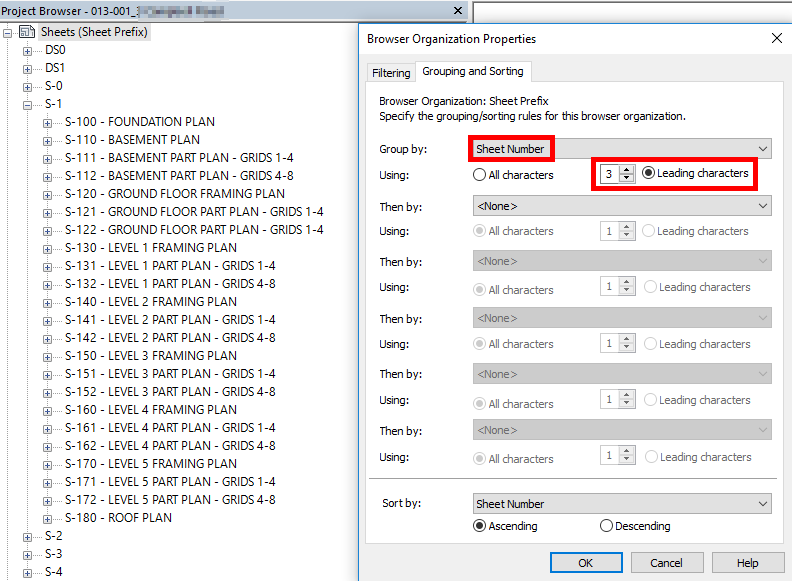
This way if we know we want to open a plan, we just go straight to the S-1 series dropdown. Much easier!
Organizing Views
When our projects get large, our views increase so much it can be hard to handle them and find what we’re looking for.
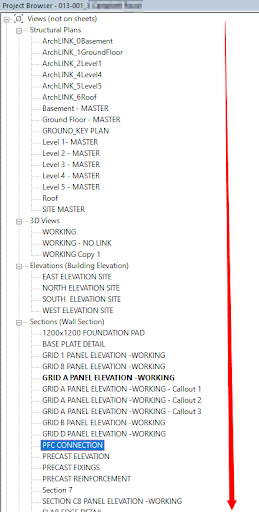
To help us organize our views a bit better, we’re going to add a parameter to our views from which we can organize our Project Browser.
The first thing we need to do is to go to the Manage tab and click on Project Parameters.

In the Project Parameters dialog box, click Add…
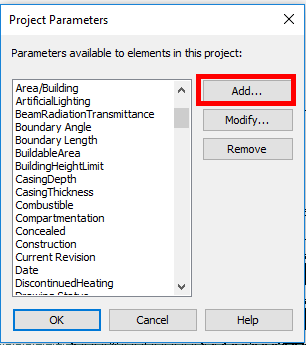
Now we can make this new parameter a Shared Parameter so we can use it on multiple projects, or we can just add it to our template file as a Project Parameter and then it will be there each time we start a project. For this example, we are going to go with a Project Parameter but the idea is much the same.
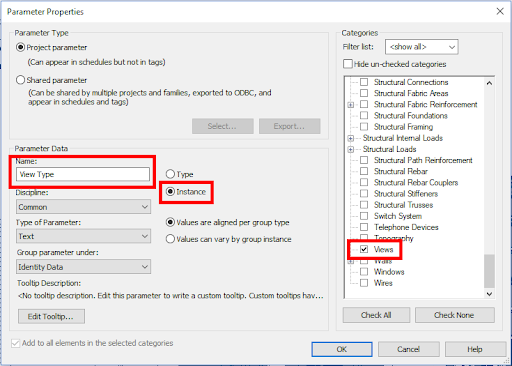
Under the Categories list on the right, scroll down until you find Views and select the checkbox. Give your parameter a name (I called mine View Type), make it a Text Parameter and pick a heading to group it under. Click OK and then OK again.
Now on the Properties box on every single view in the project, there will be a View Type parameter available. Here you can type in whatever name/title you would like to group the view under. For example, it could be by type of detail e.g Cladding Details, a function e.g Working View or Coordination View etc. or basically whatever you want!
Next, we open our Browser Organization, and on the Views tab click New.
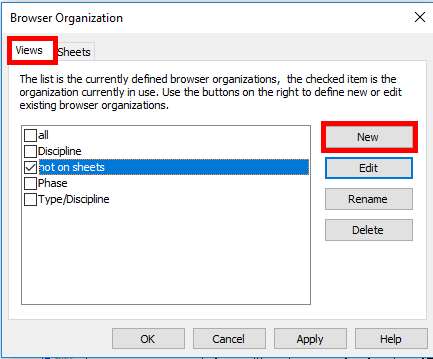
Give it a name, I called mine the same as my parameter:
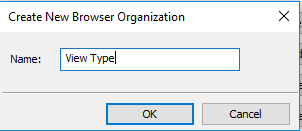
Next, go to the Grouping and Sorting tab, and the first drop down select Type. This groups Views together such as 3d Views, Plans, Sections etc.
On the second drop down, select View Types (or whatever you named your parameter).
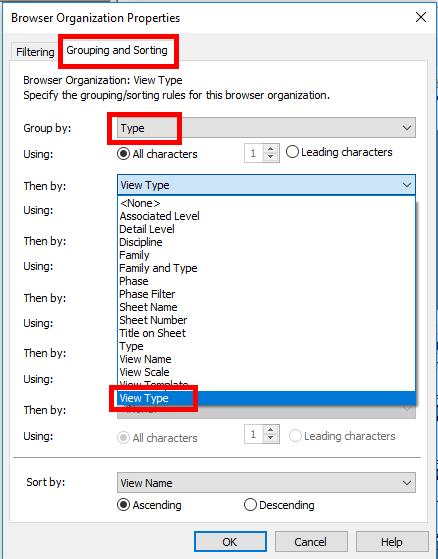
Your views will now be grouped under their View Type designations. This will have your project browser looking much more streamlined and efficient!
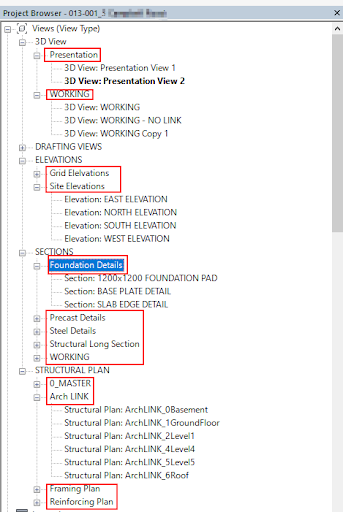
As you can see each View is organized and grouped under its View Type. This makes navigating and finding views much easier!
--
Karl Tanner
Karl Tanner is a Structural Revit Technician and founder of RevitIQ.com. He's passionate about Revit, BIM and how digital tools can benefit the construction industry. He has implemented the use of Revit/BIM processes in his workplaces and helped mentor and guide junior staff using industry best practices. He has several years of experience working on a variety of projects, including large commercial and residential buildings, zoo and aquarium enclosures, energy sector structures and seismic retrofits of heritage buildings.





Can this be done using a view template? When I change the name of the view type in the template dialog it changes the type for all the views using that template.
Hi Rich! Yes, you can drive a "View Type" shared parameter via a view template.
Do you have an update for suggestions for the SCHEDULE Brower Organization?